Lime Cheesecake

Easy, make-ahead, no-cook Lime Cheesecake

This Lime Cheesecake is the perfect dessert for a celebration or a family dinner. You can make it in advance, it does not require cooking and it has a fantastic combination of creaminess with zesty citrus. It is not too heavy which, combined with its citrus zest, makes it the perfect ending to a special meal.

I make all types of cheesecakes, and also desserts such as Banoffee Pie which have a similar biscuit base. There is something about the combination of the smashed-up buttery biscuit with a creamy topping which seems to be popular with all ages! Smashing up the biscuits is also quite therapeutic..

This is a no-bake recipe. I think the way that it works is almost magical. The citrus juices react with the cream cheese and the cream causing it to solidify. The mixture may seem too liquid when it is first combined but, once it has been poured into the tin and left for a couple of hours, it will have firmed up.

All things citrus – lovely limes and lovely lemons..

I love all things citrus and would take the lemon or lime flavoured dessert over chocolate any day of the week. (I accept I may be in the minority!) If you share my love of citrus, and like this Lime Cheesecake, you might also like some of my other recipes such as Lemon Pavlova, Lemon Curd Ice Cream, Lemon Drizzle Cake or Blood Orange Cake.

Easy Lime Cheesecake

Print
clock clock iconcutlery cutlery iconflag flag iconfolder folder iconinstagram instagram iconpinterest pinterest iconfacebook facebook iconprint print iconsquares squares iconheart heart iconheart solid heart solid icon
Lime Cheesecake

Lime Cheesecake

  • Author: Tastebotanical
  • Prep Time: 15
  • Total Time: 15 minutes
  • Yield: Serves 6
  • Category: Cheesecake
  • Cuisine: English

Description

This tangy, make-ahead no-cook lime cheesecake is such an easy dessert.  Its not too heavy and its zesty citrus flavour is perfect at the end of special meal.


Ingredients

Scale
  • 175 g digestive biscuits
  • 75 g butter
  • Grated zest and juice of 2 limes
  • Grated zest and juice of 1 lemon
  • 115 g caster sugar
  • 350 g cream cheese
  • 150 ml double cream
  • Fresh lime slices to decorate (optional)

Lime Cheesecake


Instructions

  1. Crush the digestive biscuits into crumbs.  I have two methods to do this – both equally therapeutic.  Either I put the biscuits in a plastic sandwich bag and then bash with a rolling pin or I put the biscuits in a metal bowl (the one from my food processor is perfect) and bash with a rolling pin.
  2. Melt the butter.  I generally do this by putting it in a bowl and heating briefly in the microwave.
  3. Stir the melted butter into the crumbs.
  4. Press the buttery crumbs into a 20 cm loose-based flan or cake tin.  Put the tin into the fridge while you get on and prepare the other ingredients.  The butter will cool and solidify and mean that the base of your cheesecake is stable.
  5. In a bowl, mix the zest and juice of the limes and lemon with the sugar and cream cheese.
  6. Beat the double cream until it forms soft peaks and then fold it into the mixture.   The mixture will look lumpy and also a bit runny.  Do not worry – it is supposed to look like that!
  7. Spoon the mixture over the biscuit crumb base. 
  8. Leave the cheesecake in the fridge for several hours, ideally overnight, to set.  The acid from the citrus fruit will react with the cream and cream cheese and form a firm mixture so that it should be easy to remove from the tin when you are ready to eat it.
  9. If you wish, you can decorate the top of the cheesecake with fresh lime slices or some grated lime zest.


Lime Cheesecake


Keywords: cheesecake, lime, lemon

This recipe has been shared on #CookBlogShare with Recipes Made Easy and #FiestaFriday with Fiesta Friday and Mollie@FrugalHausFrau

Products from Amazon.co.uk

Loved this recipe? You may also like the following recipes. Or checkout the Recipe Index.

Lime Drizzle Cake with Coconut

Lime Drizzle Cake with Coconut

Easy loaf cake combining tropical flavours of lime and coconut

Lemon Curd

Easy Lemon Curd

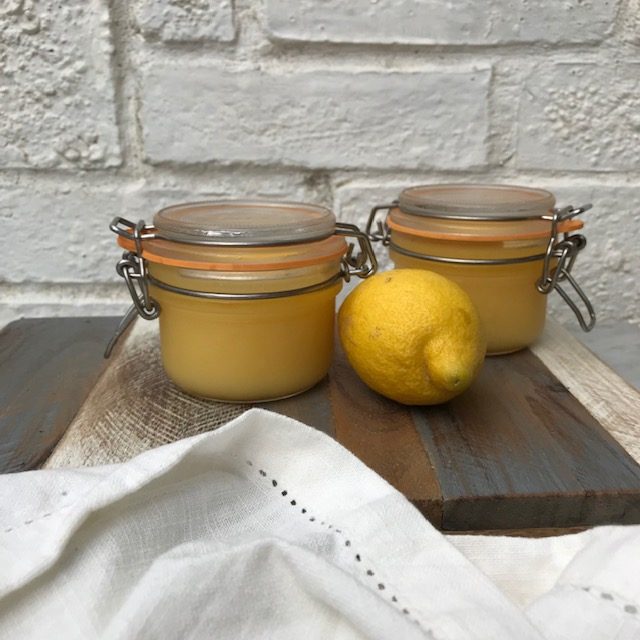
It is so easy to make your own Lemon Curd to use in a range of desserts and cakes or simply to eat on fresh bread!

Lemon Pavlova

Lemon Pavlova

Light, citrus dessert using fresh lemon curd

Lemon Curd Ice Cream

Lemon Curd Ice Cream

Easy, ice cream using fresh lemon curd

Candied Lemon and Lime Slices - cake decoration

Candied Lemon and Lime Slices

Sweet citrus slices for use in decorating cakes and desserts

Vegetarian Mince Pies

Vegetarian Mince Pies - a Christmas recipe

Vegetarian Mince Pies – crisp flaky golden pastry and rich fruity brandy-infused mincemeat and all ready in just over half an hour. Your kitchen will be filled with delicious seasonal baking aromas and you will be able to offer everyone, veggies and meat-eaters, a warm pie fresh from the oven. If you want to get into the Christmas baking vibe, without doing anything too complicated or time consuming, then this is your go-to recipe.

In a world where there is a proliferation of good-quality ready-made Mince Pies, I think it is still worth making your own as it is an easy short-cut to seasonal baking bliss without too much effort. At this time of the year, spending an hour or so making these beauties, ignoring the cold outside, is just what I want to do. This is the perfect, no-fuss Christmas recipe!

Vegetarian Mince Pies - a Christmas recipe

What you need to know about this recipe

This is my manifesto for Mince Pie making heaven.

  • I think home-made Mincemeat is best and I have a recipe on this blog. However, you do need to make it in advance and, frankly, you may not have either the time or inclination to do this. Using shop-bought mincemeat is absolutely fine but try and go for one that is good quality. If you are using shop-bought mincemeat, you can add a teaspoon of brandy or port to the mixture, which will really lift the flavour, or a squeeze of fresh lemon juice if you don’t want to use alcohol. Adding some grated orange or lemon peel is also good.
  • Whether you are using home-made or shop-bought mincemeat, you can add an additional hidden treat to your pies. I will sometimes add the following to each pie, on top of the mincemeat filling, before putting on the pastry lid: a chunk of marzipan, a few dried cranberries, a piece of dark chocolate, a glace cherry or a lump of cheese.
  • Again, I think home-made pastry is best. It has a buttery crispness which even good quality ready-made pastry doesn’t seem to have. It is also really easy to make your own pastry. However, again, you may not have the time or inclination to make your own. If you want to use shop-bought pastry, that is fine. Just make sure you get a brand that is “all butter” as it will generally taste better.
  • You can go for different shaped “lids” for you pies but, honestly, stars are best. It is Christmas after all and you can’t get much more festive than a star!
  • When you are baking your pies, make sure that the door to your kitchen is open so the smell of baking and alcohol-infused fruit spreads throughout your house.
How to eat your mince pies

Without a doubt, mince pies are best eaten warm. If you are not eating them immediately, you can re-heat them by popping them in the oven at 180 C, 350 F or Gas Mark 4 for five minutes. You can eat them on their own. You can eat them with whipped or pouring cream (if you must). I eat mine with a lump of strong cheese (extra mature cheddar) and a glass of Pedro Ximenez sherry, if I can. Try it before you judge.

Vegetarian Mince Pies - a Christmas recipe
Other festive sauces and accompaniments

I think that no festive meal is complete without some warm and fragrant Mince Pies made with home-made vegetarian Mincemeat. They are the perfect Christmas recipe! Another of my Christmas baking recipes, which goes very well with Mince Pies, is my Cinnamon Biscuits (Cookies) flavoured with cranberries and tangerine.

Having the right sauces and accompaniments can take a festive meal to the next level. If you are preparing a special festive meal for Thanksgiving, Christmas or New Year you might like to try some of my other recipes for drinks, snacks, accompaniments and desserts. They are very easy and are a great way to create a celebratory festive feast!

How to make vegetarian Mince Pies

Vegetarian Mince Pies

Print
clock clock iconcutlery cutlery iconflag flag iconfolder folder iconinstagram instagram iconpinterest pinterest iconfacebook facebook iconprint print iconsquares squares iconheart heart iconheart solid heart solid icon
Vegetarian Mince Pies

Vegetarian Mince Pies

  • Author: Tastebotanical
  • Prep Time: 15
  • Cook Time: 20
  • Total Time: 35 minutes
  • Yield: 12 large pies 1x
  • Category: Pies
  • Method: Baking
  • Cuisine: English

Description

These easy Vegetarian Mince Pies combine crisp buttery pastry with rich, brandy-infused dried fruit.  They are the taste of Christmas!


Ingredients

Scale

For the pastry:

  • 275 g plain flour
  • 125 g fat (I use a mix of half butter and half Trex as I think this makes the lightest pastry)
  • Salt
  • A little water

For the filling:

  • 1 large jar of mincemeat – see my easy Vegetarian Mincemeat recipe or use good quality shop-bought
  • A little milk and caster sugar

Vegetarian Mince Pies


Instructions

  1. Set you oven to 180 C, 350 F or Gas Mark 4.
  2. Make the pastry. Put the flour in a bowl.  Add the fat and combine –  either by “rubbing in” by hand or processing – until the mixture resembles breadcrumbs.  Season with salt and pepper.  Add a little cold water (2-3 tbsp) and shape the mixture into a dough.  
  3. If you have time, allow your pastry dough to rest for half an hour, wrapped in cling film, as this will make the resulting pastry more tender.  If you do not have the time, don’t worry!
  4. Roll out the pastry on a floured surface so that it is as thin as possible.
  5. Using a round pastry cutter which is slightly larger than the depressions in your pie tin cut circles from your pastry.  I use a 7.5 cm diameter pastry cutter which is fairly standard.
  6. Place a circle in each of the depressions in your pie tin.
  7. Put 2 teaspoons of mincemeat onto each pastry circle.
  8. Using a star shaped pastry cutter, cut stars from the remainder of the pastry. Place them on top of each mound of mincemeat.
  9. Paint the top of each star with a little milk using a pastry brush.  Sprinkle with caster sugar.  This will make the top of the pies golden and crunchy.  (Some people add beaten egg instead but I always think it is a waste of an egg as you don’t need very much of it!)
  10. Put the pies in the oven and bake for 15-20 minutes.  They will be done when the pastry is golden.
  11. Remove the  pies from the tin immediately and place on a cooling rack.

Vegetarian Mince Pies

Vegetarian Mince Pies


Notes

  • This quantity of pastry and mincemeat makes approximately 12 large pies.  It will vary according to how thin you roll your pastry and the size of the depressions in you pie tin.
  • This recipe is vegetarian (as long as you use vegetarian Mincemeat)

Keywords: Mince Pies, Christmas, baking

This recipe has been shared on #CookBlogShare with Lost in Food  and #FiestaFriday with Fiesta Friday and Jhuls at The Not So Creative Cook and #BakingCrumbs with Apply to Face Blog

Vegetarian Stuffing

Vegetarian Stuffing with Chestnuts, Pecans and Cranberries

These Vegetarian Stuffing balls are crammed with flavour and texture. Chestnuts, both chopped and pureed, add a sweet creaminess which binds the other ingredients together. Roasted pecans add a nutty crunch and dried cranberries, one of my new favourite ingredients, at a sweet-sharp hit of fruitiness. I use fresh nutmeg to add a seasonal spiciness to the recipe.

They are a great addition to a big, celebratory roast dinner. Try them with home-made Bread Sauce and Fresh Cranberry Sauce and tell me I’m wrong! Think nutty crunchiness, creamy richness and zesty, fruity sweetness.

Why bother making Vegetarian Stuffing?

In addition to the flavour, there are lots of good things about this recipe. First off, it is a vegetarian side dish which will also appeal to meat-eaters. My family is a mixture of carnivores, vegetarians and pescatarians so I have a ready-made focus group for my recipes. The verdict was that these are pretty much as good as any meat-based alternative. Therefore, you can put them on everyone’s plate – cosying up to the turkey or the nut-roast – and they work just as well.

They are also really easy to make – just a matter of mixing the various ingredients together – and can be prepared in advance. Just make up the stuffing balls and keep covered in the fridge until you are ready to cook them. They only take 15 minutes to cook.

They are also pretty versatile. Although I came up with this recipe as accompaniment to a roast dinner, I sometimes make them as a vegetarian lunch or snack option. They are also great cold as part of a packed lunch or winter picnic.

Other festive sauces and accompaniments

Having the right sauces and accompaniments can take a festive meal to the next level. If you are preparing a special festive meal for Thanksgiving, Christmas or New Year you might like to try some of my other recipes for drinks, snacks, accompaniments and desserts. They are very easy and are a great way to create a celebratory festive feast!

Vegetarian Stuffing Recipe

Print
clock clock iconcutlery cutlery iconflag flag iconfolder folder iconinstagram instagram iconpinterest pinterest iconfacebook facebook iconprint print iconsquares squares iconheart heart iconheart solid heart solid icon

Vegetarian Stuffing

  • Author: Tastebotanical
  • Prep Time: 15
  • Cook Time: 15
  • Total Time: 30 minutes
  • Yield: Serves 6
  • Category: Stuffing
  • Method: Roasting
  • Cuisine: English

Description

This quick and easy Vegetarian Stuffing recipe combines the sweet creaminess of chestnuts with onions, crunchy roasted pecans and fruity dried cranberries.


Ingredients

Scale
  • 50 g (2 oz) butter or 2 tablespoons of oil
  • 1 onion
  • 180 g (6 oz) vacuum-packed peeled chestnuts
  • 50 g (2 oz) shelled pecans
  • 50 g (2 oz) fresh white breadcrumbs
  • 50 g (2 oz) dried cranberries
  • Salt and pepper 
  • Grated nutmeg
  • 1 egg (optional)


Instructions

  1. Set your oven to 200 C/180F/Gas Mark 6
  2. Peel and chop the onion.  Put the onion and butter or oil in a frying pan and fry for 10 minutes until the onion is soft and translucent.
  3. Process half (90g) of the chestnuts for a few minutes in a food processor or blender to form a puree.  Roughly chop the remaining chestnuts.
  4. Put the pecans in a frying pan and dry fry (with no oil or butter) for 5 minutes until they are darker brown and toasted.  Roughly chop the pecans.
  5. In a large bowl combine the fried onions, chestnut puree, chopped chestnuts, chopped pecans, breadcrumbs and cranberries.
  6. Season to taste with grated nutmeg and salt and pepper.
  7. You can add an egg to the mixture to make it easier to combine.
  8. Take a dessert spoon of the mixture and squeeze it in your hands to make a ball.  Place on a baking tray.  Repeat until all the mixture has been used.
  9. Put the tray in the pre-heated oven and cook the stuffing balls for 15 minutes.
  10. Serve immediately.

Vegetarian Stuffing


Notes

This recipe is vegetarian but can be made vegan if oil is substituted for butter and the egg is omitted. 

These stuffing balls are actually very nice cold either as a snack or as an accompaniment to a cold meal.

Keywords: stuffing, vegetarian stuffing, chestnut stuffing, Christmas

This recipe has been shared on #CookBlogShare with Lost in Food  and #Fiesta Friday with Fiesta Friday and Jhuls at The Not So Creative Cook

Bread Sauce Recipe

Easy, freshly-made Bread Sauce recipe

Try this home-made Bread Sauce recipe and you will never again use ready-made or packet versions! Most importantly, it tastes fantastic. It is rich, creamy and buttery. It is warm and soothing and delicately flavoured with nutmeg and bay. It is also exceptionally easy to make and requires little or no culinary skill and can be made ahead and then gently re-heated so it is a brilliant side dish for a big, celebratory meal.

Its Christmas dinner – don’t panic!

This recipe is one that my mother used to make at Christmas. It is a fantastic sauce to have with a big festive dinner as its creaminess enhances the drier ingredients, such as turkey or vegetarian main courses such as nut roast. I always think that producing a tasty Christmas dinner is difficult even for experienced cooks. Not only are you producing dishes that you may only make once a year, you are often doing it for a large number of people who may have a wide range of food preferences and your thought processes on the day may well be impacted by a higher than average intake of alcohol! My Christmas dinner tips, which helped me when I first took on the role of primary Christmas dinner cook, are as follows.

Some Christmas dinner tips

  • Do not panic.
  • Plan it as you would any other meal. That is, that it needs a centrepiece (turkey, nut-roast, wellington), something to add juiciness (gravy), something to add zest (Cranberry Sauce), something to add richness (Bread Sauce), something to add texture (roast potatoes and stuffing), something for everyone to hate (Brussels Sprouts) – just kidding, I am actually a sprout lover and impose them on my family once a year at Christmas time..
  • Keep it simple. I generally don’t bother with a starter on the basis that, unless you are in training as the next presenter of Man v Food, full Christmas dinner plus pudding is sufficient. I do serve very simple canapes and nibbles (Cheese Biscuits, Spiced Nuts) when everyone starts with the aperitifs in order to try to absorb the alcohol.
  • Do as much of the preparation as possible the day before (peeling vegetables, making stuffing, Cranberry Sauce, Bread Sauce etc).
  • Delegate tasks whenever possible. Granny can decorate the table. Even young children can peel vegetables.
  • Write out in advance on a bit of paper when everything needs to start cooking. You will need this once you start hitting the champagne at 11.00 am.
  • Do not stress about dessert. A shop-bought Christmas Pudding which can be heated in the microwave is the way to go. Or why not just have Mince Pies?
  • Do not panic – did I say that already?
  • For guidance on dealing with family disputes and/or feuds, dealing with the combination of a range of political views and a large quantity of alcohol and people of all ages who do not like their presents, I am afraid you will have to look elsewhere.

Bread Sauce Recipe

Print
clock clock iconcutlery cutlery iconflag flag iconfolder folder iconinstagram instagram iconpinterest pinterest iconfacebook facebook iconprint print iconsquares squares iconheart heart iconheart solid heart solid icon
Bread Sauce

Bread Sauce Recipe

  • Author: Tastebotanical
  • Prep Time: 5
  • Cook Time: 5
  • Total Time: 10 minutes
  • Yield: Serves 6
  • Category: Sauce
  • Cuisine: English

Description

This home-made Bread Sauce recipe is quick and easy to make.  It has a rich creaminess, flavoured with bay and nutmeg, which is a sumptuous addition to any celebratory meal.


Ingredients

Scale
  • 1 onion
  • 300 ml milk
  • 1 bay leaf
  • 6 black peppercorns
  • Grated nutmeg
  • 75 g fresh white breadcrumbs
  • 75 g butter
  • 100 ml double cream
  • Salt and pepper to taste


Instructions

  1. Peel and chop the onion.
  2. Put the chopped onion into a small saucepan.  Add the milk, bay leaf and peppercorns. 
  3. Heat the milk until it starts to gently bubble.  Don’t let it boil over!
  4. At this point, you can set aside the milk without removing the flavourings.  Once it is cool, leave it in the fridge overnight and then use as from step 5.  This allows the flavour to develop.  However, if you want to eat the breadsauce on the same day, you can just proceed as from step 5.
  5. Strain the milk to remove the flavourings. 
  6. Pour the flavoured milk into a small saucepan and add the grated nutmeg, breadcrumbs, butter and cream.
  7. Heat gently, stirring to combine, until the butter is melted.
  8. Serve warm topped with a little more grated nutmeg.

Bread Sauce


Notes

It is very easy to make your own breadcrumbs.  Just tear or cut white bread into large pieces and then process for a few seconds in a blender or food processor.  It works best if the bread is proper, crusty bread and if it is slightly stale.

It is really worth obtaining your grated nutmeg from actually grating a whole nutmeg rather than using ready-grated nutgmeg.  You can buy a jar of whole nutmegs in most supermarkets and then just use a food grater to grate what you need into your dishes.  Just smell the freshly grated nutmeg and you will understand!

Keywords: bread sauce, seasonal sauce, roast dinner

This recipe has been shared on #CookBlogShare with Everyday Healthy Recipes and #Fiesta Friday with Fiesta Friday.

Loved this recipe? You may also like the following recipes. Or checkout the Recipe Index.

Cranberry Ice Cream

Easy Cranberry Ice Cream made with Fresh Cranberry Sauce

This Cranberry Ice Cream is made with Fresh Cranberry Sauce which gives it the added flavours of white wine, orange and cinnamon. Using Fresh Cranberry Sauce, adds an extra dimension to this ice cream and makes it the perfect seasonal pudding.

So, there are two ways you can go with this Cranberry Ice Cream. First off, if you have made some Fresh Cranberry Sauce to eat with your Christmas dinner and you have some left over, you can use any that is left over to make this ice cream. If you go down that route – and it is super-easy to make your own cranberry sauce – then making this ice cream is a doddle.

However, if you do not happen to have any surplus Fresh Cranberry Sauce to hand – and maybe you don’t really fancy it with your Christmas dinner (or maybe its not even Christmas) – you can make a batch to use as an ingredient in puddings. I have two excellent cranberry-based puddings on this blog each of which conveniently uses half a batch of my sauce recipe. One is this Cranberry Ice Cream and the other is my Cranberry Pavlova. Both are great at Christmas or New Year, when there are a lot of fresh cranberries about, and I think they are a brilliant alternative to heavy Christmas pudding! They are both sweet and creamy with the fruity tang of cranberries.

Other home-made ice cream recipes

I am a great home-made ice cream enthusiast. I make it in the summer, of course, but am happy to eat it in winter too! There are some brilliant, shop-bought ice creams available but it is so easy to make your own. I like to experiment with flavours and some of my other ice cream recipes are listed below.

Easy Cranberry Ice Cream recipe

Print
clock clock iconcutlery cutlery iconflag flag iconfolder folder iconinstagram instagram iconpinterest pinterest iconfacebook facebook iconprint print iconsquares squares iconheart heart iconheart solid heart solid icon
Cranberry Ice Cream

Cranberry Ice Cream

  • Author: Tastebotanical
  • Prep Time: 10
  • Cook Time: 15
  • Total Time: 25 minutes
  • Yield: Serves 6
  • Category: Ice Cream
  • Cuisine: English

Description

This Cranberry Ice Cream is made with Fresh Cranberry Sauce, which not only includes cranberries but is also flavoured with white wine, orange and cinnamon, adds an extra dimension and makes it the perfect seasonal pudding.


Ingredients

Scale


Instructions

  1. Whisk the egg yolks with the sugar in a bowl until the mixture looks paler and resembles a mousse.
  2. Put the cream in a saucepan and heat gently. Do not allow to boil – it will be the right temperature when you are just about able to bear to dip a finger in it!
  3. Pour the cream into the bowl containing the egg yolks and sugar, whisking all the time.
  4. Transfer the combined mixture into a bowl set over a pan of simmering water or, ideally a double-boiler, as you need to reheat it very gently.
  5. The mixture will gradually thicken until it looks like a custard (which is what it is).  Stir regularly to make sure it does not stick while it is thickening.
  6. Remove the thick custard from the heat and transfer into a bowl. 
  7. If you are using my home-made Fresh Cranberry Sauce, you will need to use a food processor or hand-held blender to chop up the whole berries and create a rough paste before adding to the custard.  If you are using smooth, ready-made Cranberry Sauce, you can just stir it into the custard.
  8. Allow the mixture to cool to room temperature and then transfer to the fridge to become thoroughly chilled.
  9. When you are ready to make the ice-cream, transfer to your ice-cream maker and use according to your machine’s instructions.  If you do not have an ice-cream maker, you can place the mixture in a freezer-proof container, put in the freezer for several hours until half-frozen.  Whisk the mixture and then return to the container and replace in the freezer until totally frozen.

Cranberry Ice Cream


Notes

If you don’t have the time or inclination to make your own Fresh Cranberry Sauce – and it honestly is very quick and easy – you can use ready-made Cranberry Sauce although the flavour will not be as good unless you can find one that includes cinnamon, orange and white wine!

Keywords: ice cream, cranberries, cranberry sauce, Christmas

This recipe has been shared on #CookBlogShare with Recipes Made Easy and #Fiesta Friday with Fiesta Friday and Spades, Spatulas and Spoons