Mushroom and Chestnut Pies

Vegetarian Mushroom and Chestnut Pies
Mushroom and Chestnut Pies

Mushroom and Chestnut Pies

These Mushroom and Chestnut Pies make a fantastic vegetarian main course at an autumn or winter dinner.   I often make them for Sunday lunch when I usually serve both vegetarian and non-vegetarian guests.  The non-vegetarians get a roast and the vegetarians get the Mushroom and Chestnut Pies.  They both go well with the same accompaniments – roast potatoes, cauliflower in white sauce, buttered carrots, parsnips – which makes things easy!

What makes these pies particularly good is the combination of the mushrooms and the chestnuts.   The chestnuts add a sweetness which goes very well with the bosky savouriness of the mushrooms.   Also, I think there is something special and celebratory about dishes that include crisp flaky pastry.   These pies are part of my traditional Christmas Day dinner when I serve both vegetarians and  non-vegetarians.

Mushroom and Chestnut Pies

Print
clock clock iconcutlery cutlery iconflag flag iconfolder folder iconinstagram instagram iconpinterest pinterest iconfacebook facebook iconprint print iconsquares squares iconheart heart iconheart solid heart solid icon
Vegetarian Mushroom and Chestnut Pies

Mushroom and Chestnut Pies

  • Author: Tastebotanical
  • Prep Time: 10
  • Cook Time: 50
  • Total Time: 1 hour
  • Yield: Serves 6
  • Category: Pies
  • Method: Baking
  • Cuisine: English

Description

These Mushroom and Chestnut pies are the perfect autumn main course combining savoury mushrooms and sweet chestnuts wrapped in crisp buttery pastry.


Ingredients

Scale
  • 25 g butter and 1 teaspoon oil (or 2 tsp if vegan)
  • 1 onion
  • 1 bulb of fennel
  • 2 sticks of celery
  • Salt and pepper
  • 250 g mushrooms
  • 1 garlic clove
  • Several sprigs of fresh thyme (or one teaspoon of dried thyme)
  • 180 g of peeled, whole chestnuts
  • 500 g packet of puff pastry
  • 1 egg

Instructions

  1. Heat the butter and oil in a large heavy-based pan
  2. Peel and chop the onion, fennel and celery. Add the vegetables to the pan and season with salt and pepper.
  3. Cook very gently for around 30 minutes until the vegetables are soft and sweet. Slow cooking caramelises the natural sugars in the vegetables and greatly improves the flavour of the dish.
  4. Slice the mushrooms and add them to the pan together with the peeled and crushed garlic clove. Cook for a further five minutes.
  5. If using fresh thyme, remove the leaves from the woody stems. Add the thyme to the vegetable mixture.
  6. Roughly chop the chestnuts and add them to the vegetable mixture. Cook for a further five minutes.
  7. Roll out the puff pastry to a thickness of approximately half a centimetre.  Cut circles from the pastry.  Either use a pastry cutter or cut around a small saucer or plate.
  8. Break and lightly whisk the egg.  Use a pastry brush to paint egg around the circumference of one of the pastry circles.    Place a spoonful of the mushroom and chestnut mixture in the centre of the circle and then fold the pastry circle in half to form a semi-circular pie.   Paint some more of the egg over the top of the pie. Repeat for the rest of the pastry circles.
  9. Place the pies on a baking sheet and bake in the oven for 15-20 minutes until golden brown.

Keywords: vegetarian, mushroom, chestnut, pies

Loved this recipe?  You may also like


Butternut Squash Tart with Chilli and Sage

Garlic Tart

Asparagus and Herb Cheese Tart

Beetroot Tart

Beetroot Tart

This Beetroot Tart has a lovely sweet and savoury taste and a fantastic dark carmine-pink colour if made with red beetroot.   You can also make it with golden beetroot or, if you want a particularly spectacular effect, with a mixture of the two in contrasting stripes!

I find this Beetroot Tart to be a very versatile autumn or winter dish.  It can be made ahead and can be eaten either hot or at room temperature.   It makes a good vegetarian main course and, because it is so flavourful,  needs only simple accompaniments such as a green salad and some buttery boiled potatoes.

Other beetroot recipes

I love the sweet, earthy taste of roasted beetroot and the fantastic rich carmine pink colour that it brings to every dish in which it is included.   The flavour is autumn on a  plate and the colour cheers me up as days are getting cooler and I know winter is on its way.

Some of my favourite recipes include a very quick and salad, Raw Beetroot and Carrot Salad with Citrus Dressing and a Middle Eastern-inspired Roasted Beetroot Salad with Yogurt and Tahini which is a bit more substantial. I also have a fantastic recipe for a vegan Beetroot Soup with Coconut.

Other quiche and tart recipes

Savoury tarts and quiches are a fantastic, cook-ahead simple supper or lunch. They are easy to make and are great either hot or at room temperature. They can also be easily divided into portions if you are feeding a large number of people. Easily transportable, they also make a good addition to lunch-boxes or basis for a picnic. Here are some of my favourites.

Loved this recipe? Checkout the Recipe Index.

Beetroot Tart

Print
clock clock iconcutlery cutlery iconflag flag iconfolder folder iconinstagram instagram iconpinterest pinterest iconfacebook facebook iconprint print iconsquares squares iconheart heart iconheart solid heart solid icon
Beetroot tart

Beetroot Tart

  • Author: Tastebotanical
  • Prep Time: 15
  • Cook Time: 1 hour 25 minutes
  • Total Time: 1 hour 40 minutes
  • Yield: Serves 6
  • Category: Tart
  • Method: Baking
  • Cuisine: English

Description

This Beetroot Tart has a great sweet and savoury taste and makes a fantastic autumn vegetarian lunch or supper.  As with all beetroot dishes, it also has an amazing dark carmine-pink colour.


Ingredients

Scale

For the pastry

  • 275 g plain flour
  • 125 g fat (I use a mix of half butter and half Trex as I think this makes the lightest pastry)
  • Salt and pepper
  • Several sprigs of fresh thyme (or one teaspoon of dried thyme)
  • A little water

For the filling

  • 4 medium beetroot
  • 25 g butter and 1 teaspoon oil
  • 2 onions
  • Salt and pepper
  • Several sprigs of fresh thyme (or one teaspoon of dried thyme)
  • 3 tablespoon balsamic vinegar
  • 1 tablespoon brown sugar
  • 2 eggs
  • 150 ml double cream
  • Freshly grated nutmeg

Instructions

  1. Set your oven to 180 C, 350 F or Gas Mark 4.
  2. Wash your beetroot and loosely wrap each one in kitchen foil.  Place the wrapped beetroot on an oven tray.   Roast the beetroot in the oven for around 40 minutes until soft.   Remove the beetroot from the oven and allow to cool.  When they are cool enough to handle, remove the skins using a sharp knife.
  3. Make the pastry. Put the flour in a bowl.  Add the fat and combine –  either by “rubbing in” by hand or processing – until the mixture resembles breadcrumbs.  Remove the leaves from your sprigs of fresh thyme and add to the mixture (or add one teaspoon of dried thyme). Season with salt and pepper.  Add a little cold water (2-3 tbsp) and shape the mixture into a dough.
  4. Roll out your pastry and use it to line your quiche or flan dish.   Bake for 15  minutes in the oven to allow the pastry to “set”.  This will stop the filling making it soggy.
  5. Heat the butter and oil in a large frying pan.   Peel and chop the onions, season with salt and pepper and cook gently for around 15 minutes until soft and translucent.
  6. Remove the leaves from your sprigs of fresh thyme (or one teaspoon of dried thyme) and add to the pan.
  7. Coarsely grate the roasted, peeled beetroot and add to the pan together with the vinegar and the sugar.    Cook the mixture gently for a further 10 minutes.
  8. Remove the onion and beetroot mixture from the pan and spoon it into your pastry case.
  9. Beat the eggs and add the cream and grated nutmeg.   Pour into the pastry case.
  10. Place the tart in your oven and bake for 35 minutes.

Notes

This tart can be eaten hot or at room temperature.

You can make this tart with golden beetroot instead of red beetroot or with a mix of both in dramatic contrasting stripes if you wish!

Keywords: beetroot, tart, vegetarian

Garlic Tart

Garlic Tart

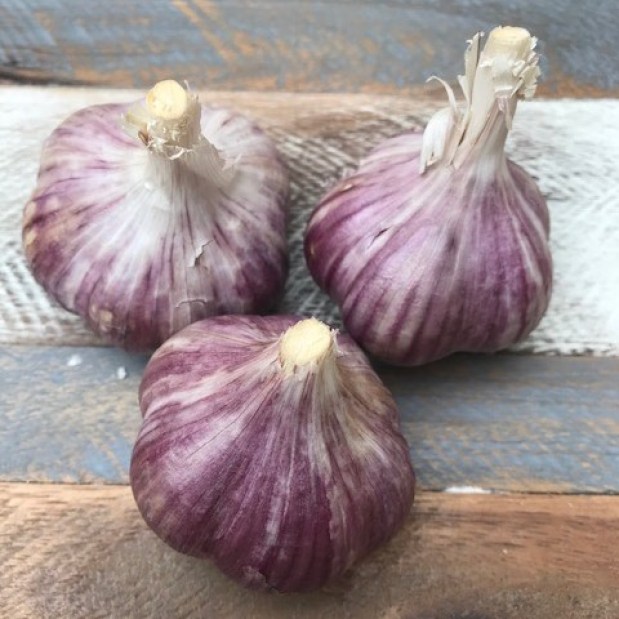
This is a truly garlicky Garlic Tart!   Garlic haters, step away now as this is a celebration of garlicky delights.    I came up with this recipe because I wanted a tart where garlic was truly the star of the show.  It includes caramelised garlic cloves and  a savoury garlic-flavoured custard.  Although it does include cheese, its flavour is a background note.  Toasted pine-nuts are included on top to add a bit of crunch texture.

You can eat this tart at room temperature or hot from the oven. Have it for a simple supper or lunch. It is also great for picnics, buffets and lunch-boxes. You can make it ahead of time which makes it very convenient when you are entertaining.

What you need to know about this recipe

  • I generally make my own pastry. I was a late learner when it came to pastry and for years used ready-made versions. However, a few years ago I decided I had to get to grips with pastry-making and discovered how easy it is. So, if you have the time to make your own pastry, it is really worth doing as the taste will be much better than anything you can buy in the shops. However, if you don’t have the time or inclination, you can make this recipe using ready-made pastry and it will still taste pretty good.
  • Whether you are making your own pastry or using ready-made, it is really important to bake the empty pastry case in the oven for 15 minutes before you add the filling (step 3). This sets the pastry and means that it is properly cooked so it will be crisp and delicious rather than soft and soggy.
  • It is really garlicky! It uses three bulbs – yes, bulbs, not cloves – of garlic. This sounds like a lot of garlic. Actually, it is a lot of garlic! However, the cloves are blanched and then caramelised before being cooked in the tart. You end up with a rich, mellow garlic flavour which is not overpowering.
Other quiche and tart recipes

Savoury tarts and quiches are a fantastic, cook-ahead simple supper or lunch. They are easy to make and are great either hot or at room temperature. They can also be easily divided into portions if you are feeding a large number of people. Easily transportable, they also make a good addition to lunch-boxes or basis for a picnic. Some of my favourites are listed below.

Loved this recipe? Checkout the Recipe Index.

Garlic Tart recipe

Print
clock clock iconcutlery cutlery iconflag flag iconfolder folder iconinstagram instagram iconpinterest pinterest iconfacebook facebook iconprint print iconsquares squares iconheart heart iconheart solid heart solid icon
Garlic Tart

Garlic Tart

  • Author: Tastebotanical
  • Prep Time: 15
  • Cook Time: 35
  • Total Time: 50 minutes
  • Yield: Serves 8
  • Category: Tart
  • Method: Baking
  • Cuisine: English

Description

This Garlic Tart contains caramelised garlic cloves set in a savoury garlic-flavoured custard in a crisp pasty case and is topped with toasted pinenuts.


Ingredients

Scale

For the pastry:

  • 275 g (10 oz) plain flour
  • 125 g (4 oz) fat (I use a mix of half butter and half Trex as I think this makes the lightest pastry)
  • Salt and pepper
  • A little water

For the filling:

  • 3 bulbs garlic (Note: bulbs not cloves – you need a lot of garlic for this recipe!)
  • 1 tablespoon olive oil
  • Salt and pepper
  • 1 tablespoon balasamic vinegar
  • 1 tablespoon brown sugar
  • 3 eggs
  • 75 g (3 oz) strong cheddar or another hard cheese
  • 200 ml (7 fl oz) cream
  • 1 tablespoon of pine nuts

Instructions

  1. Set your oven to 180 C, 350 F or Gas Mark 4.
  2. Make the pastry. Put the flour in a bowl.  Add the fat and combine –  either by “rubbing in” by hand or processing – until the mixture resembles breadcrumbs.  Season with salt and pepper.  Add a little cold water (2-3 tbsp) and shape the mixture into a dough.
  3. Roll out your pastry and use it to line your quiche or flan dish.   Bake for 20  minutes in the oven to allow the pastry to “set”.  This will stop the filling making it soggy!
  4. Separate your garlic bulbs into individual cloves. You do not need to peel them at this stage.  Take two cloves of garlic from one of your bulbs and set aside (See step 7).
  5. Place the remaining cloves in a pan of boiling water. Boil for 3 mins.  Remove the cloves and allow to cool for a few minutes.  Remove the skins.
  6. Heat the olive oil in a small frying pan. Add the skinned garlic cloves.  Season with salt and pepper and fry for 5 minutes until soft and golden.   Then add the balsamic vinegar and brown sugar and cook gently for a further 2 minutes until brown and sticky.
  7. Crack the eggs into a mixing bowl, add the cream, and beat until combined.  Finely grate the cheddar cheese and add to the mixture.  Peel and crush the two reserved garlic cloves and add to the mixture.
  8. Now place the caramelised garlic cloves in your pastry case.  Pour the egg mixture over them.
  9. Place your quiche or flan dish in the oven and cook for 25 minutes.   At the end of this time, scatter the pinenuts on the top of the tart and cook for a further 5 minutes.
  10. The tart can be eaten hot, room temperature or cold.

Keywords: garlic tart, garlic, vegetarian

Spaghetti with Smoked Salmon, Herb Fennel and Chives

Spaghetti with smoked salmon
Smoked salmon, herb fennel and chives

Spaghetti with Smoked Salmon, Herb Fennel and Chives

Spaghetti with Smoked Salmon, Herb Fennel and Chives is probably the  quickest and easiest pasta dish.   It is done in the time that it takes to cook the pasta – which is usually around 10 to 15 minutes – and only needs a single saucepan.   It is also extremely tasty with the cream absorbing the savoury, salty smoked salmon flavour and allowing it to permeate the whole dish.   Although smoked salmon is often considered a luxury food, and can be expensive,  a little goes a long way and it is fine to use smoked salmon trimmings which are sold in most supermarkets and are a lot more affordable.

The use of fresh herbs to enhance dishes and the ease with which this can be done – you just chop them up and add them at the end of cooking – is highlighted in this dish.   I have referred to Herb Fennel, to differentiate it from the bulb fennel, often used in Italian cooking.  Both the Herb and bulb fennel share an aniseed taste.  Therefore, if you do not have Herb Fennel, dill is a good substitute.

My daughter, who is a pescatarian and therefore eats fish but not meat, describes this pasta sauce as being like spaghetti carbonara for non-meat eaters.  I think she is right – there is definitely an echo in this dish of the creamy, salty taste created by pancetta and eggs in a carbonara.

Uses

I often make this dish as a quick family supper but, as the smoked salmon makes it seem luxurious, it is also a really good easy option for a dinner party or for a date night!    It would certainly be a good choice for a romantic meal as it is so quick and tasty and is easy for those with little cooking experience to prepare (and, unusually for my pasta recipes, it does not include garlic!)


Spaghetti with smoked salmon
Smoked salmon, herb fennel and chives

Print

clock clock iconcutlery cutlery iconflag flag iconfolder folder iconinstagram instagram iconpinterest pinterest iconfacebook facebook iconprint print iconsquares squares iconheart heart iconheart solid heart solid icon
Smoked salmon, fennel and chives

Spaghetti with Smoked Salmon, Herb Fennel and Chives

  • Author: Tastebotanical
  • Prep Time: 5
  • Cook Time: 10
  • Total Time: 15 minutes
  • Yield: for 4 people 1x
  • Category: Pasta
  • Cuisine: English

Description

This quick and easy pasta dish combines delicious smoked salmon with fennel and lemon.   It takes a matter of minutes to prepare and is perfect for supper after a long day at work.


Ingredients

Scale
  • 500 g dried spaghetti
  • Salt
  • 100 g smoked salmon (smoked salmon trimmings are fine)
  • 2 fronds of herb fennel (or dill)
  • Bunch of chives (about 6 stems)
  • 150 ml double cream
  • A knob of butter
  • Zest of half a lemon
  • Black pepper

Instructions

  1. Fill the large saucepan with water and bring to the boil.   When boiling, add a pinch of salt, put the spaghetti in the saucepan and cook according to instructions (generally this will be for around 10 minutes).
  2. Meanwhile, cut the smoked salmon into small pieces and finely chop the herb fennel and chives.
  3. When the spaghetti is cooked, drain it and return it to the saucepan.  Stir in the smoked salmon pieces, chopped herbs, double cream and knob of butter.   Grate a little lemon zest over the pasta – the amount will depend on how lemony you like your pasta.   Season with black pepper.  There is no need to add any extra salt as the smoked salmon will be very salty.
  4. Remove the pasta from the pan and serve.

Keywords: smoked salmon, pasta, chives, fennel

Spaghetti with smoked salmon
Mix the sauce with the spaghetti

Loved this recipe?  You may like

Prawn Pasta with Sorrel and Chive Herb Butter

Tomato Tart

tomato tart

Fresh Tomato Tart

This Tomato Tart showcases both the look and taste of sweet, seasonal tomatoes.   A pastry case holds the sliced tomatoes which are surrounded by a savoury custard made with eggs, cream and strong cheddar cheese. A few chopped chives are added to enhance the flavour.

This Tomato Tart can be eaten hot, warm or at room temperature. It is a great vegetarian make-ahead recipe which can be served at lunch or dinner or taken on a picnic.

I make a lot of tomato-based dishes but in many of them the tomatoes are reduced to a sauce.  The taste is great but it doesn’t look so pretty!  My aim was to create a tart where their beauty and variety could be seen as well as their taste enjoyed. There are so many different varieties now available in stores, or to grow in your garden, in such a range of sizes and colours from yellow to orange to deep red.   They look beautiful and are great eaten  just as they are in salads or as an accompaniment to cold dishes.  However,  I came up with the idea for my Tomato Tart  because I wanted a cooked dish which retained their beautiful colours and shapes as well as highlighting their taste.

Tomato tart, tomato quiche,

What you need to know about this Tomato Tart recipe

  • I generally make my own pastry. I was a late learner when it came to pastry and for years used ready-made versions. However, a few years ago I decided I had to get to grips with pastry-making and discovered how easy it is. So, if you have the time to make your own pastry, it is really worth doing as the taste will be much better than anything you can buy in the shops. However, if you don’t have the time or inclination, you can make this recipe using ready-made pastry and it will still taste pretty good.
  • Whether you are making your own pastry or using ready-made, it is really important to bake the empty pastry case in the oven for 15 minutes before you add the filling (step 3). This sets the pastry and means that it is properly cooked so it will be crisp and delicious rather than soft and soggy.
  • You can easily remove the skins from the tomatoes by immersing them in boiling water and then cooling them down in cold water (step 4). Make sure that you don’t leave them in the boiling water for too long or they will start to cook and may go a bit mushy.
  • I use a strong, extra-mature cheddar cheese in this recipe. You can use other hard cheeses but make sure you use one with a strong flavour. You need this to balance the sweetness of the tomatoes.
  • In this recipe, I add chopped chives to the Tomato Tart. I often add chives to a tomato salad and think that the combination works well together. However, you could use other herbs if you prefer. I think basil or oregano would be good alternatives.

Loved this recipe? Check out the Recipe Index

Other quiche and tart recipes

Savoury tarts and quiches are a fantastic, cook-ahead simple supper or lunch. They are easy to make and are great either hot or at room temperature. They can also be easily divided into portions if you are feeding a large number of people. Easily transportable, they also make a good addition to lunch-boxes or basis for a picnic. Some of my favourites are listed below.

Tomato tart
Tomato tart

Fresh Tomato Tart recipe

Print
clock clock iconcutlery cutlery iconflag flag iconfolder folder iconinstagram instagram iconpinterest pinterest iconfacebook facebook iconprint print iconsquares squares iconheart heart iconheart solid heart solid icon
tomato tart

Tomato Tart

  • Author: Tastebotanical
  • Prep Time: 20
  • Cook Time: 40
  • Total Time: 1 hour
  • Yield: 1 tart serving 8 people 1x
  • Category: Tart
  • Method: Baking
  • Cuisine: English

Description

This make-ahead, vegetarian Tomato Tart using sweet, juicy tomatoes, fresh chives and tangy cheese is the perfect choice for a summer lunch or picnic.


Ingredients

Scale

For the pastry:

  • 275 g (10 oz) plain flour
  • 125 g (4 oz) fat (I use a mix of half butter and half Trex as I think this makes the lightest pastry)
  • Salt
  • A little water

For the filling:

  • 150 ml (5 fluid oz) double cream
  • 4 eggs
  • 150 g (5 oz) strong cheddar cheese (grated)
  • Salt and pepper
  • A large bunch of fresh chives (around 15 stems)
  • 67 assorted tomatoes – I use various sizes and colours as I think it looks nice!

Instructions

  1. Set your oven to 180 C, 350 F or Gas Mark 4.
  2. Make the pastry. Put the flour in a bowl.  Add the fat and combine –  either by “rubbing in” by hand or processing – until the mixture resembles breadcrumbs.  Season with salt and pepper.  Add a little cold water (2-3 tbsp) and shape the mixture into a dough.
  3. Roll out your pastry and use it to line your quiche or flan dish.   Bake for 15  minutes in the oven to allow the pastry to “set”.  This will stop the filling making it soggy.
  4. Remove the skins from your tomatoes.  I find the easiest way to do this is to immersing them in boiling water for around 1 minute and then immersing in cold water to cool them down (so that they are not too hot to handle and do not continue to “cook”).  The skins should then be easy to  peel off the tomatoes.
  5. When you have skinned the tomatoes, slice them into thin discs.
  6. Crack the eggs into a mixing bowl, add the cream, and beat until combined.  Finely grate the cheddar cheese and add to the mixture.
  7. Chop your fresh chives and add them to the egg, cream and cheese mixture and season with salt and pepper.   Pour the mixture into your pastry case.
  8. Place the tomato discs on top of the mixture in the pastry case.
  9. Place your quiche or flan dish in the oven and cook for 25 minutes.
  10. The tart can be eaten hot, room temperature or cold.
Tomato tart, tomato quiche
Tomato tart

Keywords: tomato, tart

Loved this recipe? Check out the Recipe Index